Tutorial Part 1 - Setup
In this part of the tutorial, you will create a new .NET project for testing with Boa Constrictor. You will also install all the dependencies you need to run that project.
1. Installing the IDE
Microsoft Visual Studio is the recommended editor/IDE for this tutorial. Visual Studio makes it easy to create projects, add packages, navigate code, and run tests. Be sure to install the latest version. This tutorial will use Visual Studio 2019.
Note: You may also use other editors/IDEs, like Visual Studio Code or JetBrains Rider. However, tutorial instructions for project setup will use Visual Studio.
2. Setting up the Web Browser
This tutorial uses Google Chrome for Web UI automation. Chrome is fast and has wide market share. Chrome DevTools also make it easy to find elements when writing locators. Install or update the latest version of Chrome on your machine before starting the tutorial.
Since Boa Constrictor uses Selenium WebDriver under the hood, you will also need to download and install the latest version of ChromeDriver on your system PATH. Follow the instructions on the Selenium WebDriver Driver Requirements page to set it up.
Note: You may also use other browsers for testing,
like Mozilla Firefox,
Apple Safari,
or Microsoft Edge.
To use other browsers, install the appropriate WebDriver executable,
and substitute the desired WebDriver constructor in the example code in place of ChromeDriver.
3. Creating the Project
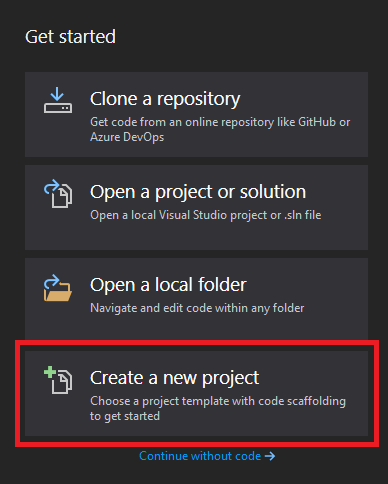
Open Visual Studio and select Create a new project:
Select NUnit Test Project as the project type:
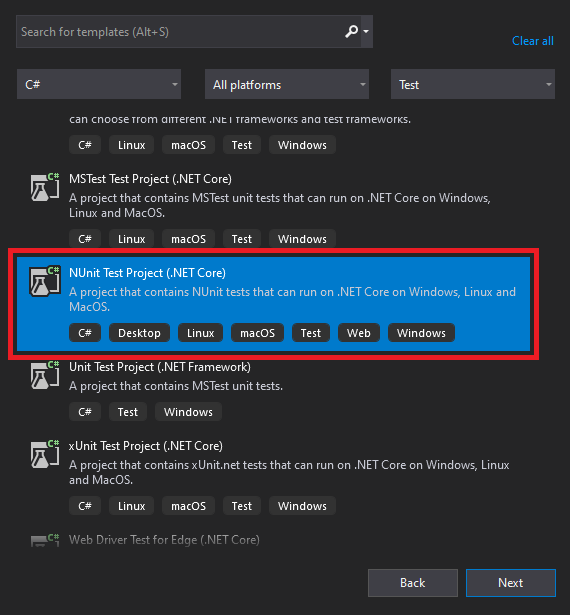
Note: The tutorial will use NUnit as the core test framework. Boa Constrictor can also work with other test frameworks, like SpecFlow and xUnit.net. It can also be used for automation without a test framework.
Note:
Boa Constrictor libraries target .NET Standard 2.0,
which means they can support any kind of .NET project (.NET 5+, .NET Framework, or .NET Core).
The Boa.Constrictor.Example reference project in the repository targets .NET 7.
Name the project “Boa.Constrictor.Example”, and set the Location field to the folder where you want to create the project. You may keep the default value for Solution name (which should default to the Project name).
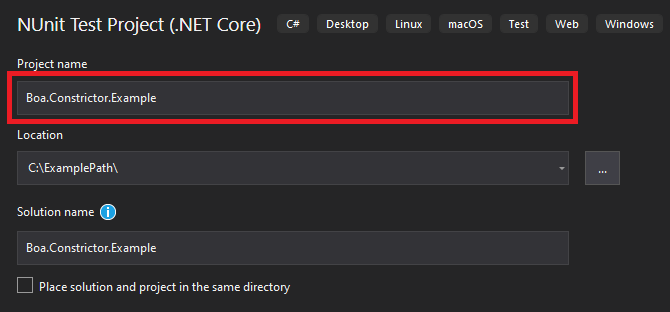
Note: In .NET, one “solution” may have one to many “project”. If you are new to .NET development, please read the Visual Studio docs on projects and solutions.
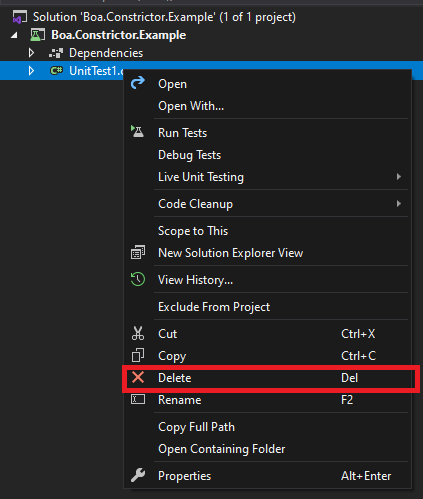
The project should appear in Solution Explorer once it is created.
It may contain a placeholder class file named UnitTest1.cs.
If so, right-click the file in Solution Explorer and select Delete.
4. Installing NuGet Packages
You will need to add the following NuGet packages to the project:
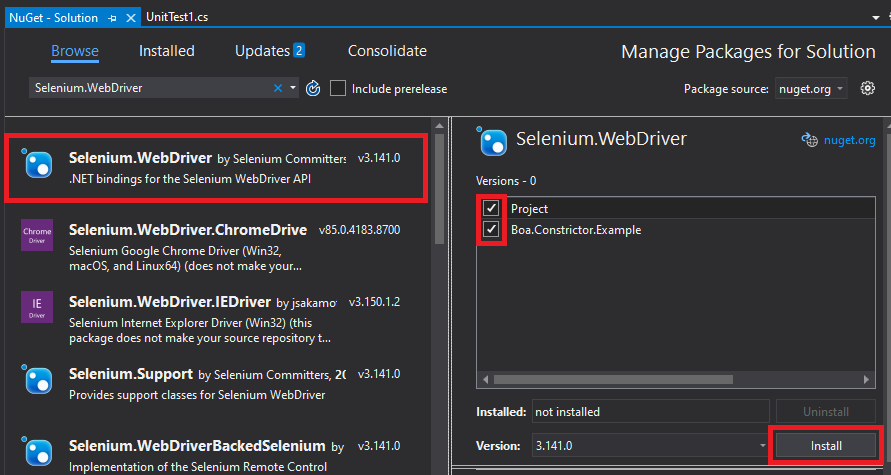
To add them, right-click the solution in Solution Explorer, and select Manage Nuget Packages for Solution….

On the NuGet page, go to the Browse tab, search for each NuGet package by name, and click the package when it appears.
Then, select the Boa.Constrictor.Example project for the package and click Install.
Note:
If you created an NUnit Test Project through Visual Studio,
then the Boa.Constrictor.Example project should already have the NUnit and NUnit3TestAdapter packages installed.
These NuGet packages should pull in other dependencies as well. For example, Boa.Constrictor should pull in Selenium.WebDriver, RestSharp, and possibly other packages.
All Set!
This new project should now be ready for Boa Constrictor! Build the project to make sure everything is set up correctly. Then, proceed to Part 2 - Web UI Testing.